Decoding the Artifact of Sacrifice in Risk of Rain 2: A Comprehensive Guide
The Artifact of Sacrifice in Risk of Rain 2 is a game-changing modifier that significantly alters the risk-reward dynamic of your runs. Understanding its effects, benefits, and potential drawbacks is crucial for mastering the game and achieving consistent success. This comprehensive guide will delve into the intricacies of the Artifact of Sacrifice ror2 code, providing you with everything you need to know to effectively utilize this powerful artifact.
What is the Artifact of Sacrifice?
The Artifact of Sacrifice is one of the many artifacts hidden throughout the various maps of Risk of Rain 2. When activated before a run, it disables item drops from chests and enemies. Instead, all monsters have a 25% chance to drop an item upon death. This fundamentally changes how you acquire items, shifting the focus from actively searching for chests to efficiently eliminating enemies.
Unlocking the Artifact of Sacrifice
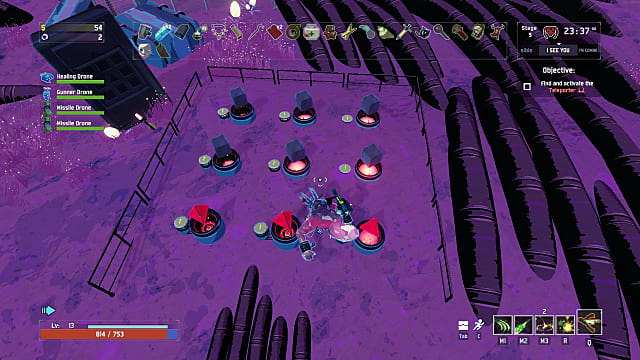
Before you can use the Artifact of Sacrifice, you must first unlock it. This involves finding the artifact code and activating it at the appropriate location. The Artifact of Sacrifice ror2 code is hidden on the Abandoned Aqueduct map. To unlock it, you need to locate nine hidden pots scattered throughout the level. Breaking all nine pots spawns the artifact at the center of the map near the two pressure plates. Interact with the artifact to add it to your collection.
Activating the Artifact
Once unlocked, you can activate the Artifact of Sacrifice at the commencement stone located at the beginning of each run. Simply interact with the stone and select the artifact from the list. Note that activating any artifact will disable achievements for that run.
The Effects of the Artifact of Sacrifice
The primary effect of the Artifact of Sacrifice is the removal of item drops from chests and interactable objects. This means you can no longer rely on finding items by exploring the map and opening chests. Instead, your item acquisition is solely dependent on the 25% drop chance from defeated monsters. The Artifact of Sacrifice ror2 code fundamentally alters the game’s pacing.
Benefits of Using the Artifact of Sacrifice
- Increased Item Acquisition Rate: While the drop chance per enemy is only 25%, the sheer number of enemies you encounter typically results in a higher overall item acquisition rate compared to relying solely on chests.
- Gold Efficiency: Since chests are rendered useless, you save a significant amount of gold that would otherwise be spent on opening them. This gold can be used for other beneficial purposes, such as activating shrines or purchasing items from the Bazaar Between Time.
- Faster Level Progression: With increased item drops, you become stronger more quickly, allowing you to clear levels faster and progress further into the game.
- Synergy with Specific Items: The Artifact of Sacrifice synergizes exceptionally well with items that benefit from killing enemies, such as the Soldier’s Syringe (increased attack speed on kill) and the Leeching Seed (healing on damage dealt).
Drawbacks of Using the Artifact of Sacrifice
- RNG Dependence: Your item acquisition is entirely dependent on random number generation (RNG). There may be times when you experience dry spells with few item drops, leading to slower progression.
- Early Game Vulnerability: The early game can be particularly challenging with the Artifact of Sacrifice, as you are reliant on enemy drops for your initial power spikes. A string of bad luck can quickly lead to a failed run.
- Reduced Exploration Incentive: The lack of items in chests reduces the incentive to explore the map thoroughly, potentially leading to missed shrines or other beneficial interactables.
Strategies for Playing with the Artifact of Sacrifice
To maximize the benefits of the Artifact of Sacrifice, it’s important to adopt specific strategies that cater to its unique gameplay style. Understanding the Artifact of Sacrifice ror2 code is the first step, then implementation is key.
Prioritize Enemy Elimination
The most obvious strategy is to prioritize eliminating enemies as quickly and efficiently as possible. Focus on dealing high damage and utilizing crowd control abilities to maximize your item drop rate. Characters with strong area-of-effect (AoE) attacks, such as the Artificer and the Loader, excel in this playstyle.
Optimize Gold Usage
Since you’re no longer spending gold on chests, you have more resources available for other purposes. Prioritize activating shrines, especially Combat Shrines and Shrine of Blood, to further increase your item acquisition rate. Consider visiting the Bazaar Between Time to purchase specific items or reroll your item drops.
Adapt Your Item Build
The Artifact of Sacrifice can significantly influence your item build. Focus on acquiring items that synergize well with enemy elimination, such as attack speed items, healing items, and items that grant temporary buffs on kill. Avoid items that rely on chests or interactable objects, such as the Rusted Key.
Manage Risk and Reward
The Artifact of Sacrifice inherently increases the risk-reward factor of the game. Be prepared to take calculated risks to maximize your item drop rate, but also be mindful of your health and resources. Avoid unnecessary engagements and prioritize your survival.
Synergies and Counters
Understanding which items and characters synergize well with the Artifact of Sacrifice is crucial for optimizing your runs. Conversely, knowing which items and characters are less effective can help you avoid making suboptimal choices.
Strong Synergies
- Soldier’s Syringe: Increased attack speed on kill significantly improves your damage output and item drop rate.
- Leeching Seed: Healing on damage dealt provides sustain and allows you to engage in more aggressive combat.
- Ukulele: Chains lightning to nearby enemies on hit, increasing your AoE damage and item drop rate.
- Bandolier: Chance to drop an ammo pack on kill, replenishing your skills and maintaining your damage output.
- Characters with strong AoE: Artificer, Loader, and Huntress excel at quickly clearing groups of enemies.
Weak Synergies
- Rusted Key: Requires opening a hidden cache, which is rendered useless by the Artifact of Sacrifice.
- Items that rely on chests: All items that are typically found in chests are less valuable with the artifact active.
- Characters with weak AoE: Characters that struggle to clear groups of enemies may have a harder time acquiring items.
Advanced Tips and Tricks
Beyond the basic strategies, there are several advanced tips and tricks that can further enhance your gameplay with the Artifact of Sacrifice.
Utilize the Bazaar Between Time
The Bazaar Between Time is a valuable resource for acquiring specific items or rerolling your item drops. Consider visiting the bazaar early in your run to acquire key items that can significantly boost your power.
Stack Luck
While the Artifact of Sacrifice doesn’t directly affect luck, increasing your luck stat can improve the quality of item drops. Items like the Clover can help you acquire more powerful and beneficial items.
Learn Enemy Spawn Patterns
Understanding enemy spawn patterns can help you anticipate enemy encounters and optimize your item drop rate. Pay attention to the types of enemies that spawn in each area and adjust your strategy accordingly.
Consider Other Artifacts
The Artifact of Sacrifice can be combined with other artifacts to create unique and challenging gameplay experiences. Experiment with different combinations to find what works best for your playstyle. [See also: Understanding Artifact Choices in Risk of Rain 2]
Conclusion
The Artifact of Sacrifice is a powerful and transformative artifact that can significantly alter the gameplay experience in Risk of Rain 2. By understanding its effects, benefits, and drawbacks, you can effectively utilize this artifact to achieve consistent success and conquer even the most challenging runs. Remember, mastering the Artifact of Sacrifice ror2 code requires strategic planning, efficient enemy elimination, and a willingness to adapt to the ever-changing circumstances of each run. Happy hunting!
