How to Reduce Screen Size: A Comprehensive Guide
In today’s digital age, screen real estate is valuable. Whether you’re working on a small laptop, managing multiple windows, or simply prefer a more streamlined view, knowing how to reduce screen size can significantly improve your productivity and overall user experience. This comprehensive guide explores various methods to effectively reduce screen size on different devices and operating systems.
Understanding the Need to Reduce Screen Size
Before diving into the methods, it’s crucial to understand why someone might want to reduce screen size. Common reasons include:
- Improved Multitasking: Smaller windows allow you to view and interact with multiple applications simultaneously.
- Enhanced Focus: By reducing the size of the active window, you can minimize distractions and concentrate on the task at hand.
- Better Accessibility: Individuals with visual impairments might find smaller text and icons easier to process. (Note: this is the opposite of increasing size for accessibility, but reducing *window* size can help focus).
- Optimizing Screen Space: On smaller screens, reducing window sizes is essential to fit everything you need.
- Personal Preference: Some users simply prefer a more compact and less overwhelming interface.
Methods to Reduce Screen Size on Windows
Windows offers several built-in features and third-party tools to effectively reduce screen size. Let’s explore the most common techniques:
Adjusting Display Resolution
Changing your display resolution is a fundamental way to reduce screen size. A lower resolution makes everything on the screen appear larger, effectively shrinking the visible area. Here’s how to do it:
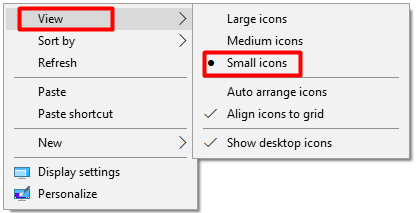
- Right-click on your desktop and select “Display settings.”
- In the “Display resolution” dropdown menu, choose a lower resolution. For example, if your current resolution is 1920×1080, try 1600×900 or 1280×720.
- Windows will prompt you to confirm the change. Review the new settings and click “Keep changes” if you’re satisfied.
Note that lowering the resolution too much can result in a blurry or pixelated image. Experiment to find a balance between screen size and image quality.
Using Zoom Settings
Windows also provides zoom settings that can reduce screen size by scaling the entire interface. This method is particularly useful for making icons and text smaller without affecting the resolution.
- Go to “Settings” > “System” > “Display.”
- Under “Scale & layout,” adjust the “Change the size of text, apps, and other items” dropdown menu.
- Selecting a smaller percentage (e.g., 100% or 125%) will reduce screen size by making everything appear smaller. A larger percentage will increase the size.
Window Management Tools
Several third-party window management tools can help you efficiently reduce screen size and arrange windows on your desktop. These tools often provide features like window snapping, tiling, and custom window sizes.
- Microsoft PowerToys: A free suite of utilities that includes FancyZones, a powerful window manager.
- DisplayFusion: A paid application with advanced window management features, including multi-monitor support.
- AquaSnap: A user-friendly tool with window snapping, tiling, and shaking features.
These tools allow you to quickly resize and position windows, maximizing your screen space and improving multitasking capabilities. For example, FancyZones allows you to define custom layouts and snap windows to specific zones, effectively reduce the apparent screen size each application occupies.
Using Keyboard Shortcuts
Keyboard shortcuts can also be used to reduce screen size by minimizing or maximizing windows. Here are some useful shortcuts:
- Windows Key + M: Minimize all windows.
- Windows Key + Shift + M: Restore minimized windows.
- Windows Key + Up Arrow: Maximize the current window.
- Windows Key + Down Arrow: Minimize the current window (or restore it if it’s maximized).
- Alt + Tab: Switch between open windows.
These shortcuts can help you quickly manage your windows and reduce screen size by minimizing unnecessary applications.
Methods to Reduce Screen Size on macOS
macOS offers similar features and tools to reduce screen size, providing users with flexibility and control over their display settings.
Adjusting Display Resolution
Like Windows, macOS allows you to change the display resolution to reduce screen size. Here’s how:
- Click on the Apple menu in the top-left corner and select “System Preferences.”
- Choose “Displays.”
- In the “Resolution” section, select “Scaled.”
- Choose a lower resolution from the list.
macOS also offers a “Default for display” option, which automatically selects the optimal resolution for your screen. However, if you want to reduce screen size, you’ll need to choose a lower resolution manually.
Using Zoom Settings
macOS provides zoom settings that can reduce screen size by scaling the entire interface. This method is similar to the zoom settings in Windows.
- Go to “System Preferences” > “Accessibility” > “Zoom.”
- Check the “Use keyboard shortcuts to zoom” box.
- Use the following shortcuts to zoom in and out:
- Option + Command + =: Zoom in.
- Option + Command + -: Zoom out (reduce screen size).
Alternatively, you can use the trackpad gesture to zoom in and out. Hold down the Control key and scroll with two fingers on the trackpad.
Window Management Tools
macOS also has several window management tools that can help you efficiently reduce screen size and arrange windows on your desktop. These tools often provide features like window snapping, tiling, and custom window sizes.
- Spectacle: A free and open-source window manager with basic window snapping and tiling features.
- Magnet: A paid application with advanced window management features, including customizable shortcuts.
- BetterSnapTool: A user-friendly tool with window snapping and tiling features.
These tools allow you to quickly resize and position windows, maximizing your screen space and improving multitasking capabilities. They effectively reduce screen size by allowing you to arrange multiple windows comfortably.
Using Keyboard Shortcuts
Keyboard shortcuts can also be used to reduce screen size by minimizing or maximizing windows. Here are some useful shortcuts:
- Command + M: Minimize the current window.
- Command + H: Hide the current application.
- Command + Option + H: Hide all other applications.
- Command + Tab: Switch between open applications.
These shortcuts can help you quickly manage your windows and reduce screen size by minimizing unnecessary applications.
Reducing Screen Size on Mobile Devices
While the term “reduce screen size” might not directly apply to the physical screen of a mobile device, you can effectively reduce screen size of elements displayed by adjusting font sizes and display zoom settings. This enhances usability and content visibility.
Adjusting Font Size
Increasing or decreasing the font size affects how much text is displayed on the screen. Smaller fonts allow more content to fit, effectively reducing screen size of the text elements.
Display Zoom
Mobile operating systems often offer display zoom features, letting you change the size of all elements displayed on the screen, including icons and text. Reducing the zoom level virtually reduces screen size, allowing you to see more content at once. This is different from physical screen size.
Considerations When Reducing Screen Size
While reducing screen size can be beneficial, it’s essential to consider the potential drawbacks:
- Eye Strain: Smaller text and icons can strain your eyes, especially if you’re working for extended periods.
- Usability Issues: Extremely small elements can be difficult to click or interact with.
- Compatibility Problems: Some applications may not scale well with smaller screen sizes or resolutions.
It’s crucial to find a balance between screen size and usability. Experiment with different settings to find what works best for you. Regularly take breaks to prevent eye strain. Remember that the optimal settings for one person might not be the same for another. The key is to customize your display to suit your individual needs and preferences. Learning how to reduce screen size effectively is a valuable skill in today’s digital world.
Conclusion
Knowing how to reduce screen size is a valuable skill for improving productivity, multitasking, and overall user experience. Whether you’re using Windows, macOS, or a mobile device, there are various methods to effectively reduce screen size and optimize your display settings. By adjusting display resolution, using zoom settings, and leveraging window management tools, you can customize your screen to suit your individual needs and preferences. Remember to consider the potential drawbacks, such as eye strain and usability issues, and find a balance between screen size and comfort. With the right approach, you can master the art of reducing screen size and unlock new levels of efficiency and enjoyment.
[See also: How to Optimize Screen Resolution for Gaming]
[See also: Best Window Management Tools for Productivity]
[See also: Accessibility Options for Visual Impairments]
