How to Reduce the Computer Screen Size: A Comprehensive Guide
In today’s digital age, computers are indispensable tools for both work and leisure. However, the default screen size might not always be ideal for everyone. Whether you have visual impairments, prefer a more focused view, or are working on a smaller display, knowing how to reduce the computer screen size is a valuable skill. This comprehensive guide will walk you through various methods to achieve your desired screen configuration, ensuring a comfortable and efficient computing experience. We’ll cover everything from built-in operating system settings to third-party software solutions, providing you with the knowledge to tailor your display to your specific needs.
Understanding the Need to Reduce Screen Size
Before diving into the methods, let’s understand why someone might want to reduce the computer screen size. Here are a few common scenarios:
- Visual Impairments: Some users with vision problems find it easier to navigate a larger interface with bigger icons and text. Reducing the resolution or using zoom features can effectively magnify the content.
- Smaller Displays: When working on laptops or smaller monitors, a high resolution can make elements appear too small, straining the eyes. Lowering the resolution or using scaling can improve readability.
- Multitasking: Reducing the size of windows can allow you to view more applications simultaneously, improving productivity.
- Personal Preference: Ultimately, the ideal screen size is subjective. Some users simply prefer a different scale for aesthetic or ergonomic reasons.
Methods to Reduce Computer Screen Size
There are several ways to reduce the computer screen size, ranging from simple adjustments within your operating system to more advanced techniques. Here’s a breakdown of the most common and effective methods:
Adjusting Display Resolution
Changing the screen resolution is the most straightforward way to affect the overall size of elements on your screen. Lowering the resolution will make everything appear larger, effectively reducing the computer screen size from a usability perspective.
Windows
- Access Display Settings: Right-click on your desktop and select “Display settings.”
- Choose Display Resolution: Scroll down to the “Display resolution” section.
- Select a Lower Resolution: Click the dropdown menu and choose a lower resolution than your current setting. Windows will typically recommend a resolution, but you can experiment with different options to find what works best for you.
- Keep Changes: After selecting a new resolution, Windows will prompt you to confirm the changes. Click “Keep changes” to save the new setting. If you don’t like the result, you can revert to the previous resolution within a few seconds.
macOS
- Open System Preferences: Click the Apple menu in the top-left corner of your screen and select “System Preferences.”
- Select Displays: Click on the “Displays” icon.
- Choose Scaled: In the “Resolution” section, select the “Scaled” option.
- Select a Lower Resolution: Choose a lower resolution from the available options. macOS will immediately apply the change.
Using Display Scaling
Display scaling allows you to adjust the size of text, apps, and other items without changing the screen resolution. This is a good option if you want to make elements larger without sacrificing screen sharpness. Scaling is another way to effectively reduce the computer screen size in terms of visual perception.
Windows
- Access Display Settings: Right-click on your desktop and select “Display settings.”
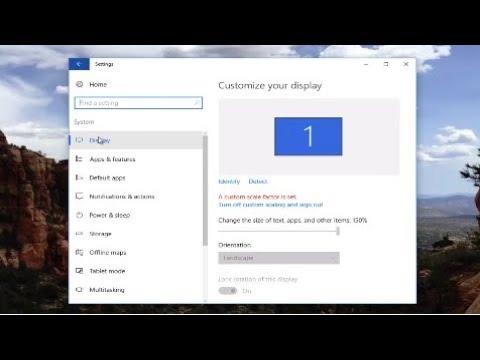
- Change the size of text, apps, and other items: Under “Scale & layout,” use the dropdown menu to select a scaling percentage. Higher percentages will make items larger.
- Custom Scaling: For more precise control, click “Advanced scaling settings” and enter a custom scaling percentage. Be cautious when using custom scaling, as some apps may not scale properly.
macOS
- Open System Preferences: Click the Apple menu in the top-left corner of your screen and select “System Preferences.”
- Select Displays: Click on the “Displays” icon.
- Adjust Scaling: Depending on your macOS version, you may see options like “Larger Text” or a slider to adjust the scaling. Choose the option that best suits your needs.
Zooming Features
Zooming features provide a quick and temporary way to reduce the computer screen size by magnifying a portion of the screen. This is particularly useful for focusing on specific details or temporarily increasing the size of text.
Windows Magnifier
Windows Magnifier is a built-in accessibility tool that allows you to magnify any part of your screen.
- Open Magnifier: Press the Windows key + Plus (+) key to open Magnifier.
- Adjust Zoom Level: Use the Plus (+) and Minus (-) keys to increase or decrease the zoom level.
- Choose a Magnifier View: Magnifier offers different views, including Full-screen, Lens, and Docked. Select the view that best suits your needs.
- Close Magnifier: Press the Windows key + Esc key to close Magnifier.
macOS Zoom
macOS offers several zoom features, including keyboard shortcuts and trackpad gestures.
- Enable Zoom: Go to System Preferences > Accessibility > Zoom.
- Use Keyboard Shortcuts: Check the box next to “Use keyboard shortcuts to zoom.” You can then use Option + Command + Plus (+) to zoom in and Option + Command + Minus (-) to zoom out.
- Use Trackpad Gestures: Check the box next to “Use scroll gesture with modifier keys to zoom.” You can then hold down the Control key and scroll with two fingers on your trackpad to zoom in and out.
Adjusting Font Size
Increasing the font size can make text more readable without affecting the size of other screen elements. This is a good option if you primarily want to improve readability without drastically reducing the computer screen size.
Windows
- Access Display Settings: Right-click on your desktop and select “Display settings.”
- Change Text Size: Under “Scale & layout,” click “Advanced scaling settings.”
- Customize Text Size: Under “Custom scaling options,” you can adjust the text size for specific elements, such as title bars, menus, and message boxes.
macOS
- Open System Preferences: Click the Apple menu in the top-left corner of your screen and select “System Preferences.”
- Select Accessibility: Click on the “Accessibility” icon.
- Select Display: Choose “Display” from the left sidebar.
- Adjust Cursor Size: Adjust the “Cursor size” slider to make the cursor bigger, which can indirectly improve readability.
- Use Dynamic Type: In some apps, you can use Dynamic Type to adjust the font size. Press Command + Plus (+) to increase the font size and Command + Minus (-) to decrease it.
Using Browser Zoom
If you’re primarily concerned with the size of content within your web browser, you can use the browser’s built-in zoom feature. This allows you to reduce the computer screen size specifically for web pages.
Chrome, Firefox, and Edge
- Use Keyboard Shortcuts: Press Ctrl + Plus (+) to zoom in and Ctrl + Minus (-) to zoom out. Press Ctrl + 0 (zero) to reset the zoom level to default.
- Use the Browser Menu: Click the browser menu (usually three dots or lines in the top-right corner) and find the zoom controls. Use the Plus (+) and Minus (-) buttons to adjust the zoom level.
Safari
- Use Keyboard Shortcuts: Press Command + Plus (+) to zoom in and Command + Minus (-) to zoom out. Press Command + 0 (zero) to reset the zoom level to default.
- Use the View Menu: Click the “View” menu in the menu bar and select “Zoom In” or “Zoom Out.”
Third-Party Software
While the built-in options are usually sufficient, some users may prefer to use third-party software for more advanced control over their display settings. These programs often offer features such as custom resolutions, color correction, and multi-monitor management. Using these can help fine-tune how to reduce the computer screen size to your exact preference.
Examples of such software include:
- DisplayFusion: A comprehensive multi-monitor management tool with advanced features for customizing your display settings.
- f.lux: Adjusts the color temperature of your display based on the time of day, reducing eye strain.
- Iris: Another tool for adjusting screen brightness and color temperature, with features specifically designed to reduce eye strain.
Troubleshooting Common Issues
Sometimes, adjusting the screen size can lead to unexpected issues. Here are some common problems and how to fix them:
- Blurry Text: This can occur when using a non-native resolution. Try using a resolution that is close to your monitor’s native resolution or adjust the ClearType settings in Windows.
- Aspect Ratio Problems: Ensure that your graphics card drivers are up to date. Incorrect aspect ratio settings can distort the image.
- App Compatibility Issues: Some older apps may not scale properly with high DPI settings. Try running the app in compatibility mode or adjusting the DPI scaling settings for that specific app.
Conclusion
Knowing how to reduce the computer screen size is essential for creating a comfortable and efficient computing environment. Whether you’re dealing with visual impairments, working on a smaller display, or simply prefer a different scale, the methods outlined in this guide should provide you with the tools to customize your display to your specific needs. Experiment with different settings and find the configuration that works best for you. Remember to keep your graphics card drivers up to date and troubleshoot any issues that may arise. With a little effort, you can optimize your display for maximum comfort and productivity. Understanding how these settings affect your overall experience is crucial for anyone spending significant time in front of a computer. [See also: Adjusting Monitor Brightness for Eye Strain] [See also: Understanding Screen Resolution] [See also: Best Monitor Settings for Gaming]
