How to Reduce the Computer Screen Size: A Comprehensive Guide
In today’s digital age, computers are indispensable tools for work, communication, and entertainment. However, the default screen size may not always be optimal for everyone. Whether you’re facing eye strain, working with limited screen real estate, or simply prefer a smaller display, knowing how to reduce the computer screen size is a valuable skill. This comprehensive guide provides multiple methods and troubleshooting tips to adjust your screen size effectively. We will explore options within your operating system, monitor settings, and even third-party software.
Understanding the Need to Reduce Screen Size
Before diving into the technical details, it’s crucial to understand why one might want to reduce the computer screen size. Common reasons include:
- Improved Ergonomics: Smaller screen sizes can reduce eye strain and neck discomfort, especially for prolonged use.
- Enhanced Accessibility: Individuals with visual impairments may find a smaller, more focused screen easier to read.
- Better Multitasking: On smaller displays, reducing the screen size of individual windows allows for more efficient multitasking.
- Performance Optimization: On older or less powerful computers, reducing screen resolution can improve performance.
- Personal Preference: Some users simply prefer a smaller display for aesthetic or functional reasons.
Methods to Reduce Computer Screen Size
Adjusting Display Resolution
The most common and straightforward method to reduce the computer screen size is by adjusting the display resolution. This method is applicable to both Windows and macOS operating systems.
Windows
- Access Display Settings: Right-click on the desktop and select ‘Display settings’.
- Change Resolution: Scroll down to the ‘Display resolution’ section.
- Select a Lower Resolution: Choose a lower resolution from the dropdown menu. The recommended resolution is usually indicated. Experiment with different resolutions until you find one that suits your needs. Note that reducing the resolution too much might result in a blurry or pixelated display.
- Confirm Changes: After selecting a resolution, Windows will prompt you to confirm the changes. If the new resolution is satisfactory, click ‘Keep changes’. If not, it will revert to the previous setting after a few seconds.
macOS
- Open System Preferences: Click on the Apple menu in the top-left corner and select ‘System Preferences’.
- Select Displays: Click on the ‘Displays’ icon.
- Choose Scaled: Under the ‘Resolution’ section, select ‘Scaled’.
- Select a Lower Resolution: Choose a lower resolution from the list. macOS will automatically adjust the display.
Using Zoom Functionality
Another way to reduce the computer screen size, especially for specific applications or websites, is by using the zoom functionality. This method allows you to zoom in or out on the content without changing the overall display resolution.
Web Browsers
Most web browsers offer built-in zoom controls. You can typically zoom in or out using the following methods:
- Keyboard Shortcuts: Press ‘Ctrl +’ (Windows) or ‘Command +’ (macOS) to zoom in, and ‘Ctrl -‘ (Windows) or ‘Command -‘ (macOS) to zoom out. Press ‘Ctrl 0’ (Windows) or ‘Command 0’ (macOS) to reset the zoom level to default.
- Browser Menu: Look for the zoom controls in the browser menu, usually represented by a ‘+’ and ‘-‘ icon.
Applications
Many applications also offer zoom functionality. The specific methods vary depending on the application, but common approaches include:
- View Menu: Check the ‘View’ menu for zoom options.
- Keyboard Shortcuts: Some applications use similar keyboard shortcuts to web browsers, such as ‘Ctrl +’ and ‘Ctrl -‘.
Adjusting DPI Scaling (Windows Only)
DPI (Dots Per Inch) scaling affects the size of text, icons, and other elements on the screen. Increasing the DPI scaling can effectively reduce the computer screen size by making everything appear smaller.
- Access Display Settings: Right-click on the desktop and select ‘Display settings’.
- Locate Scale and Layout: Find the ‘Scale and layout’ section.
- Adjust the Scaling Percentage: Use the dropdown menu to select a higher scaling percentage. The default is usually 100%, but you can increase it to 125%, 150%, or higher.
- Sign Out and Sign In: After changing the scaling percentage, you may need to sign out and sign back in for the changes to take effect fully.
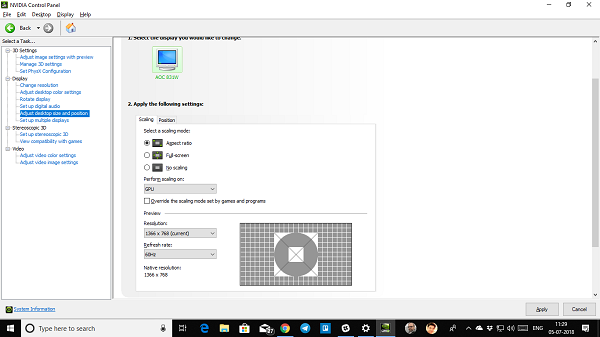
Using Monitor Settings
Some monitors have built-in settings that allow you to adjust the display size. These settings are typically accessed through the monitor’s on-screen display (OSD) menu.
- Access the OSD Menu: Press the ‘Menu’ button on your monitor. The location and appearance of the button vary depending on the monitor model.
- Navigate to Display Settings: Use the monitor’s buttons to navigate to the ‘Display’ or ‘Picture’ settings.
- Adjust the Screen Size or Aspect Ratio: Look for options to adjust the screen size or aspect ratio. Some monitors may offer preset modes, such as ‘Full’, ‘Aspect’, or ‘1:1’.
Third-Party Software
Several third-party software applications can help you reduce the computer screen size. These applications often offer more advanced features and customization options than the built-in operating system settings. For example, you might find software that allows for more granular control over DPI scaling or that provides virtual desktops with different resolutions.
Examples include:
- DisplayFusion: A powerful multi-monitor management tool with advanced screen splitting and customization features.
- Actual Window Manager: Allows you to control window sizes and positions with hotkeys and other advanced features.
Troubleshooting Common Issues
While reducing the computer screen size is usually a straightforward process, you may encounter some common issues. Here are some troubleshooting tips:
- Blurry Text or Images: If the text or images appear blurry after reducing the resolution, try adjusting the DPI scaling or using the monitor’s auto-adjust feature.
- Incorrect Aspect Ratio: If the display looks stretched or distorted, make sure the aspect ratio is set correctly in the display settings or monitor settings.
- Compatibility Issues: Some applications may not be fully compatible with lower resolutions or higher DPI scaling. Try updating the application or contacting the developer for support.
- Driver Problems: Outdated or corrupted graphics drivers can cause display issues. Make sure your graphics drivers are up to date. You can usually update them through the device manager on Windows or the App Store on macOS.
Considerations for Different Use Cases
The optimal method to reduce the computer screen size depends on your specific use case. For example:
- Gaming: Gamers may prefer to reduce the resolution to improve performance, but they should also consider the impact on image quality.
- Graphic Design: Graphic designers may need to maintain a high resolution for detail work, but they can use zoom functionality to focus on specific areas.
- Office Work: Office workers may find that adjusting the DPI scaling provides the best balance between readability and screen real estate.
Conclusion
Knowing how to reduce the computer screen size is a valuable skill that can improve your computing experience. By adjusting the display resolution, using zoom functionality, adjusting DPI scaling, or using monitor settings, you can customize your display to suit your needs and preferences. Remember to troubleshoot any common issues and consider your specific use case when choosing the best method. Experiment with different settings until you find the perfect balance between readability, screen real estate, and performance. If you’re experiencing persistent issues, [See also: Troubleshooting Display Problems] consider consulting online forums or seeking professional technical support.
