
How to Split Chrome Screen: A Comprehensive Guide to Multitasking Like a Pro
In today’s fast-paced digital world, multitasking is no longer a luxury—it’s a necessity. Whether you’re a student juggling research papers, a professional managing multiple projects, or simply someone who enjoys browsing the web while working, the ability to efficiently manage your screen real estate can significantly boost your productivity. This guide focuses on how to split Chrome screen, providing you with various methods and tips to optimize your workflow.
Google Chrome, being one of the most popular web browsers, offers several ways to split Chrome screen. From built-in features to third-party extensions, we’ll explore the most effective techniques to help you master the art of multitasking. Understanding how to split Chrome screen is a game-changer for anyone looking to enhance their productivity and streamline their online experience.
Why Split Chrome Screen? The Benefits of Multitasking
Before diving into the methods, let’s understand why splitting your Chrome screen is so beneficial:
- Enhanced Productivity: By viewing multiple tabs or windows simultaneously, you can reduce the time spent switching between tasks. This allows for a more focused and efficient workflow.
- Improved Research: When conducting research, you can have your sources open on one side of the screen and your document on the other, making it easier to reference and cite information.
- Streamlined Communication: Keep your email or messaging app open alongside your work to stay connected without interrupting your flow.
- Better Comparison: Easily compare products, prices, or information side-by-side without the hassle of constantly switching tabs.
- Optimized Learning: Follow along with online tutorials while simultaneously practicing the steps in another window.
Methods to Split Chrome Screen
There are several ways to split Chrome screen, each with its own advantages and disadvantages. Let’s explore the most common and effective methods:
Using Chrome’s Built-in Window Management
Chrome offers basic window management features that allow you to manually resize and position windows to split Chrome screen. While this method is simple and doesn’t require any additional software, it can be time-consuming and less precise than other methods.
- Resize Windows Manually: Click and drag the edges of each Chrome window to resize them.
- Position Windows: Click and drag the title bar of each window to position them side-by-side or vertically.
This method is suitable for simple tasks but can become cumbersome when dealing with multiple windows or complex layouts. If you want to split Chrome screen quickly, explore the options below.
Utilizing Operating System Features
Both Windows and macOS offer built-in features to split Chrome screen and manage windows efficiently. These features provide a more streamlined and precise way to arrange your windows.
Windows Snap Assist
Windows Snap Assist is a powerful feature that allows you to quickly split Chrome screen by dragging windows to the edges of your screen. Here’s how to use it:
- Drag to the Edge: Click and drag the title bar of a Chrome window to the left or right edge of your screen.
- Snap in Place: When you see an outline of the window filling half of the screen, release the mouse button. The window will automatically snap into place.
- Choose the Second Window: Windows will then display thumbnails of other open windows on the opposite side of the screen. Click on the window you want to fill the remaining space.
You can also use keyboard shortcuts for Windows Snap Assist:
- Windows Key + Left Arrow: Snaps the current window to the left side of the screen.
- Windows Key + Right Arrow: Snaps the current window to the right side of the screen.
- Windows Key + Up Arrow: Maximizes the current window (or snaps it to the top half of the screen if already snapped to the side).
- Windows Key + Down Arrow: Minimizes the current window (or snaps it to the bottom half of the screen if already snapped to the side).
By using these shortcuts, you can quickly and easily split Chrome screen and manage your windows without using the mouse.
macOS Split View
macOS also offers a similar feature called Split View, which allows you to split Chrome screen and work in a distraction-free environment. Here’s how to use it:
- Enter Full Screen: Hover your cursor over the green maximize button in the top-left corner of a Chrome window.
- Choose Split View: Select either “Tile Window to Left of Screen” or “Tile Window to Right of Screen” from the menu.
- Select the Second Window: macOS will then display other open windows on the opposite side of the screen. Click on the window you want to fill the remaining space.
Alternatively, you can use Mission Control to split Chrome screen:
- Open Mission Control: Press the Mission Control key (usually F3) or swipe up with three fingers on your trackpad.
- Drag Windows: Drag one Chrome window onto another in the Mission Control view. This will create a Split View space.
- Enter Split View: Click on the Split View space to enter the split-screen mode.
Split View in macOS provides a seamless way to split Chrome screen and focus on your tasks without distractions.
Using Chrome Extensions
If you’re looking for more advanced features and customization options, consider using Chrome extensions to split Chrome screen. These extensions offer a wide range of functionalities, from simple window tiling to complex layout management.
Popular Chrome Extensions for Splitting Screen
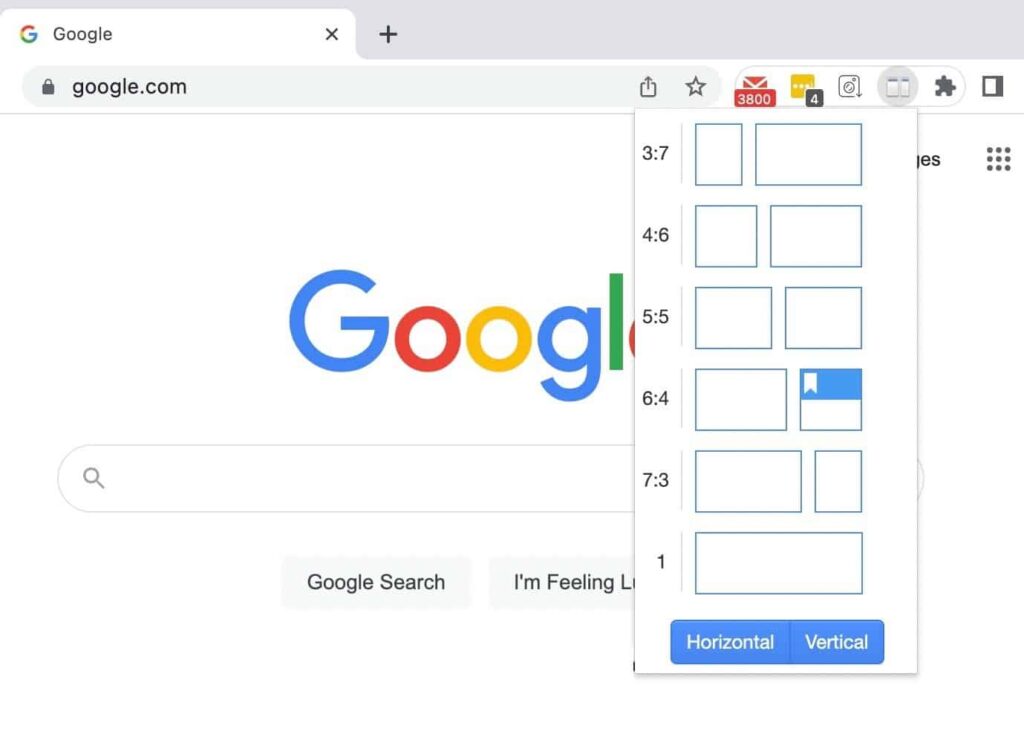
- Tab Resize: This extension allows you to easily split Chrome screen into various layouts, such as side-by-side, top-to-bottom, or in a grid. It also remembers your preferred layouts for future use.
- Window Resizer: With Window Resizer, you can define custom window sizes and positions, allowing you to create the perfect layout for your workflow. It also supports keyboard shortcuts for quick and easy window management.
- Dualless: Dualless is designed to simulate a dual-monitor setup on a single screen. It allows you to split Chrome screen into two adjustable columns, making it ideal for comparing documents or browsing multiple websites.
- Split Screen – Dual Window: This extension simplifies the process of splitting your screen into two equal parts, allowing you to quickly arrange your windows side-by-side.
To install a Chrome extension, simply visit the Chrome Web Store, search for the extension you want, and click “Add to Chrome.” Once installed, the extension will typically add an icon to your Chrome toolbar, allowing you to access its features easily.
Keyboard Shortcuts for Efficient Window Management
Mastering keyboard shortcuts can significantly speed up your workflow and make it easier to split Chrome screen. Here are some useful shortcuts for both Windows and macOS:
Windows Keyboard Shortcuts
- Windows Key + Left Arrow: Snap window to the left.
- Windows Key + Right Arrow: Snap window to the right.
- Windows Key + Up Arrow: Maximize window.
- Windows Key + Down Arrow: Minimize window.
- Alt + Tab: Switch between open windows.
- Ctrl + Shift + T: Reopen the last closed tab.
macOS Keyboard Shortcuts
- Control + Up Arrow: Enter Mission Control.
- Control + Left/Right Arrow: Switch between spaces (desktops).
- Command + Tab: Switch between open applications.
- Command + ` (backtick): Switch between windows of the same application.
- Command + W: Close the current window.
- Command + Shift + T: Reopen the last closed tab.
By incorporating these keyboard shortcuts into your daily routine, you can streamline your window management and split Chrome screen with ease.
Tips for Optimizing Your Split Screen Experience
Here are some additional tips to help you get the most out of your split-screen setup:
- Use Multiple Monitors: If possible, consider using multiple monitors for an even more expansive workspace. This allows you to dedicate entire screens to specific tasks or applications.
- Customize Your Layout: Experiment with different window layouts to find what works best for your workflow. Some tasks may benefit from a side-by-side arrangement, while others may be better suited for a vertical split.
- Minimize Distractions: Close unnecessary tabs and applications to reduce distractions and focus on the tasks at hand.
- Adjust Font Sizes: If you’re working with small windows, adjust the font sizes to make text easier to read.
- Utilize Virtual Desktops: Both Windows and macOS offer virtual desktop features, allowing you to create separate workspaces for different projects or tasks.
Conclusion
Learning how to split Chrome screen is an essential skill for anyone looking to boost their productivity and streamline their workflow. Whether you choose to use Chrome’s built-in features, operating system tools, or third-party extensions, the ability to manage your screen real estate efficiently can significantly enhance your online experience. By mastering the techniques outlined in this guide, you’ll be well on your way to becoming a multitasking pro. So go ahead, split Chrome screen, and unlock a new level of productivity!
[See also: Chrome Extensions for Productivity] [See also: Windows Snap Assist Guide] [See also: macOS Split View Tutorial]
