Mastering the Ruler in Chrome DevTools: A Comprehensive Guide
The Chrome DevTools is a suite of web developer tools built directly into the Google Chrome browser. It allows developers to inspect and debug web pages, analyze performance, and much more. Among its many features, the ruler in Chrome DevTools is a particularly useful tool for precise measurement and alignment of elements on a webpage. This guide provides a comprehensive overview of how to use the ruler in Chrome DevTools effectively to enhance your web development workflow.
Understanding the Basics of Chrome DevTools
Before diving into the specifics of the ruler in Chrome DevTools, it’s important to understand the basics of accessing and navigating the DevTools panel. To open Chrome DevTools, you can right-click on any webpage and select ‘Inspect’ or use the keyboard shortcut Ctrl+Shift+I (Windows/Linux) or Cmd+Option+I (Mac). Alternatively, you can access it through the Chrome menu (three vertical dots) > More Tools > Developer Tools.
Once open, you’ll see a panel that typically docks to the right or bottom of the browser window. The DevTools panel is divided into several tabs, including Elements, Console, Sources, Network, Performance, Memory, Application, Security, and Lighthouse. Each tab offers different tools for inspecting and debugging various aspects of a webpage.
Introducing the Ruler Tool
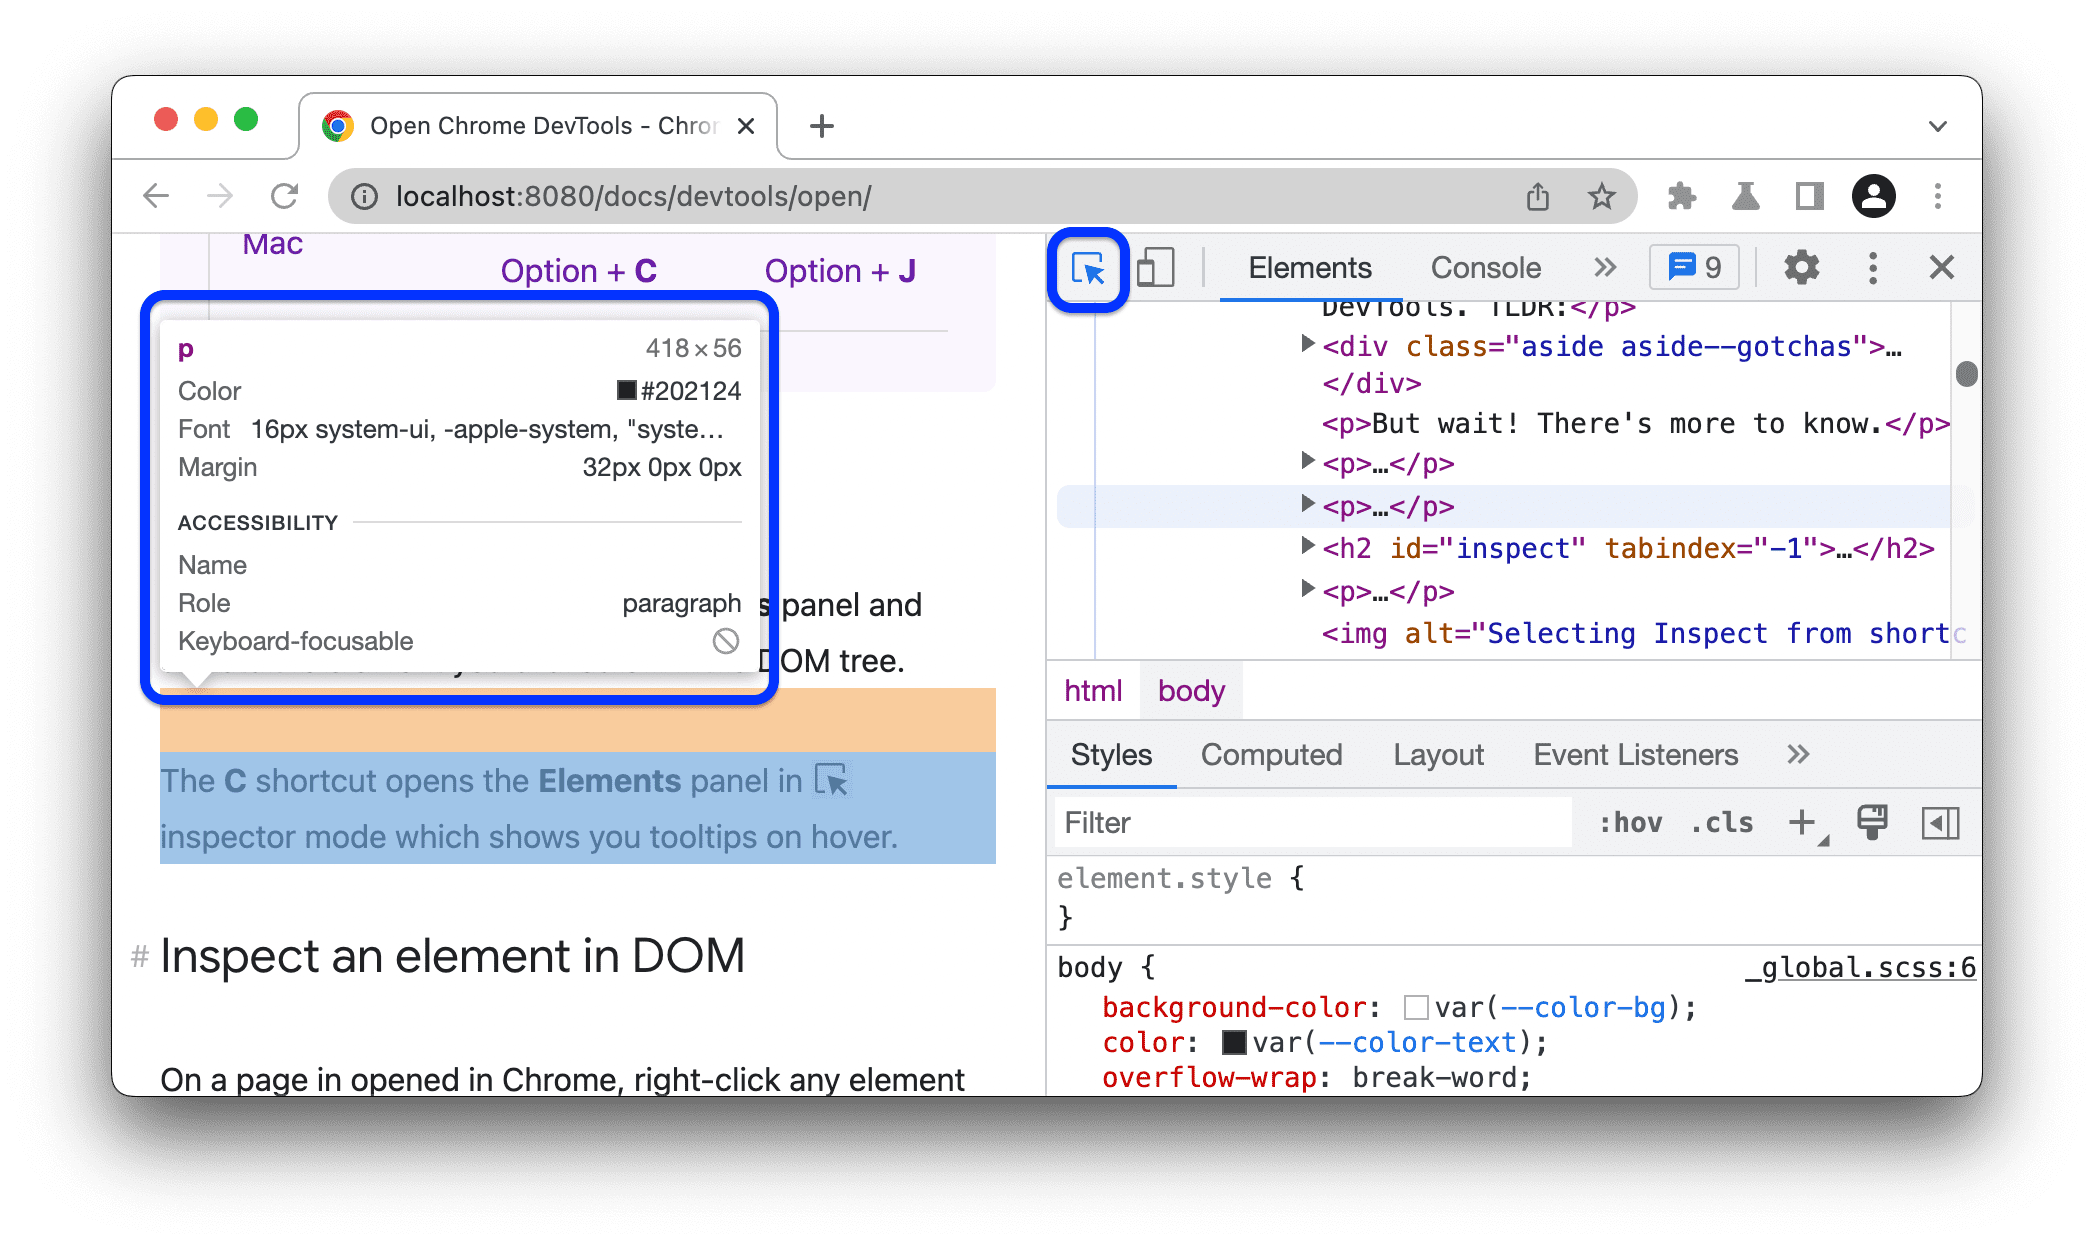
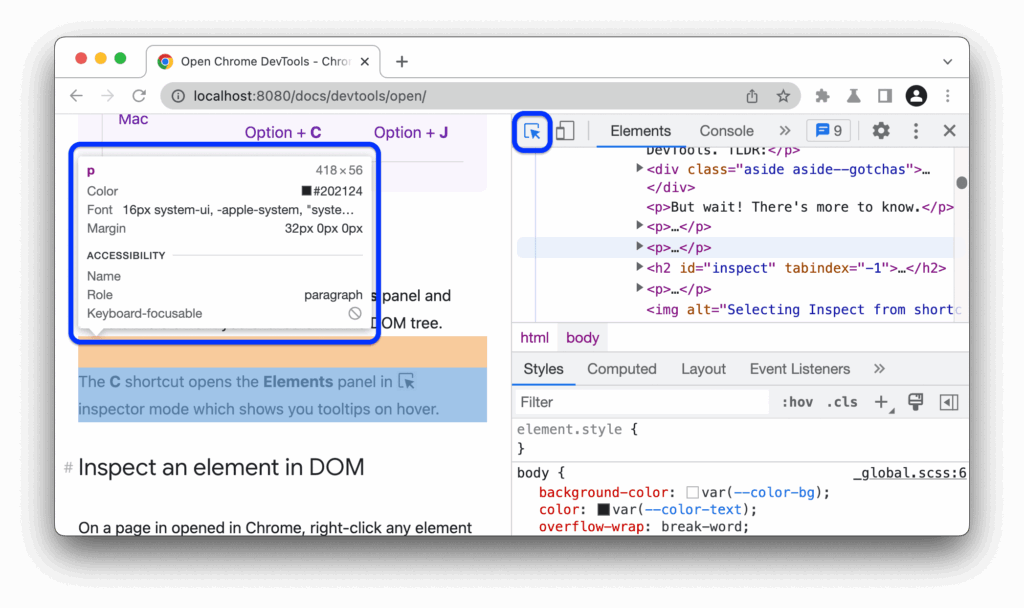
The ruler in Chrome DevTools is primarily found within the Elements panel. This panel allows you to inspect the HTML structure of the webpage and the associated CSS styles. The ruler itself appears when you hover over elements in the Elements panel or when you’re actively inspecting an element’s dimensions. It provides visual cues for the size and position of the element relative to other elements on the page.
The ruler is particularly useful for ensuring accurate alignment and spacing between elements. By hovering over an element, you can see its width, height, padding, margin, and border dimensions. This allows you to quickly identify any inconsistencies or misalignments in your design.
How to Use the Ruler in Chrome DevTools
Using the ruler in Chrome DevTools is straightforward. Here’s a step-by-step guide:
- Open Chrome DevTools: As described earlier, right-click on the webpage and select ‘Inspect’ or use the appropriate keyboard shortcut.
- Navigate to the Elements Panel: Click on the ‘Elements’ tab in the DevTools panel.
- Select an Element: Use the ‘Select an element in the page to inspect it’ tool (the arrow icon in the top-left corner of the DevTools panel) to click on the element you want to inspect on the webpage. Alternatively, you can find the element in the HTML structure within the Elements panel.
- Hover to Reveal the Ruler: Once the element is selected, hover your mouse over it in the Elements panel or on the webpage itself. The ruler will appear, displaying the element’s dimensions and spacing.
The ruler provides several key pieces of information:
- Width and Height: The dimensions of the element are displayed in pixels.
- Padding: The space between the element’s content and its border.
- Border: The line surrounding the element.
- Margin: The space outside the element’s border, separating it from other elements.
Advanced Techniques with the Ruler
Beyond basic measurement, the ruler in Chrome DevTools can be used for more advanced tasks:
Inspecting Nested Elements
When dealing with nested elements, the ruler helps you understand the relationship between parent and child elements. Hovering over a parent element shows its overall dimensions, while hovering over a child element shows its dimensions relative to the parent. This is crucial for ensuring proper layout and alignment within complex structures.
Analyzing Box Model Properties
The ruler is directly tied to the CSS box model, which defines how elements are rendered on a webpage. By inspecting the padding, border, and margin values, you can understand how these properties affect the element’s overall size and position. Modifying these values in the Styles pane of the Elements panel and observing the changes with the ruler is an effective way to fine-tune your layout.
Using the Computed Tab
The ‘Computed’ tab in the Elements panel provides a visual representation of the box model, showing the total space occupied by the element, including padding, border, and margin. This tab complements the ruler by providing a clear overview of the element’s dimensions and spacing. [See also: Understanding the Chrome DevTools Performance Tab]
Practical Applications of the Ruler Tool
The ruler in Chrome DevTools is invaluable for a variety of web development tasks:
Ensuring Pixel-Perfect Design
One of the most common uses of the ruler is to ensure that your design matches the intended specifications. By measuring elements and comparing them to design mockups, you can identify and correct any discrepancies. This is particularly important for creating pixel-perfect layouts that look consistent across different browsers and devices.
Debugging Layout Issues
When encountering layout issues, such as misaligned elements or unexpected spacing, the ruler can help you pinpoint the root cause. By inspecting the dimensions and spacing of the affected elements, you can identify any CSS properties that are causing the problem. This can save you a significant amount of time and effort in debugging complex layout issues.
Optimizing Responsive Design
In the era of responsive design, it’s crucial to ensure that your website adapts seamlessly to different screen sizes. The ruler can help you test your responsive design by measuring elements at different viewport sizes. This allows you to identify any areas where the layout breaks down or where elements are not properly aligned. [See also: Responsive Design Best Practices]
Validating Accessibility
Accessibility is an important consideration for all web developers. The ruler can help you validate the accessibility of your website by ensuring that elements are properly spaced and aligned. This is particularly important for users with visual impairments who may rely on assistive technologies to navigate your website. Proper spacing and alignment can make it easier for these users to understand and interact with your content.
Tips and Tricks for Using the Ruler Effectively
To get the most out of the ruler in Chrome DevTools, consider the following tips and tricks:
- Use the Keyboard Shortcuts: Familiarize yourself with the keyboard shortcuts for opening and navigating Chrome DevTools. This can significantly speed up your workflow.
- Toggle Element Selection: Use the ‘Select an element in the page to inspect it’ tool to quickly select elements on the webpage. This tool can be toggled on and off using the keyboard shortcut Ctrl+Shift+C (Windows/Linux) or Cmd+Shift+C (Mac).
- Inspect Pseudo-Elements: The Elements panel allows you to inspect pseudo-elements, such as ::before and ::after. This can be useful for understanding how these elements affect the layout and appearance of your webpage.
- Use Device Mode: Chrome DevTools includes a Device Mode that allows you to simulate different screen sizes and devices. This is useful for testing your responsive design and ensuring that your website looks good on all devices.
Common Issues and Troubleshooting
While the ruler in Chrome DevTools is a powerful tool, you may encounter some issues when using it:
- Ruler Not Appearing: If the ruler is not appearing when you hover over an element, make sure that the Elements panel is open and that you have selected an element to inspect. Also, ensure that you are hovering over the element in the Elements panel or on the webpage itself.
- Incorrect Dimensions: If the dimensions displayed by the ruler are incorrect, check the CSS properties of the element to ensure that they are set correctly. Also, make sure that you are not accidentally selecting a different element than the one you intended to inspect.
- Layout Issues: If you are encountering layout issues, use the ruler to inspect the dimensions and spacing of the affected elements. This can help you identify any CSS properties that are causing the problem. Also, consider using the Computed tab to get a visual representation of the box model.
Alternatives to the Chrome DevTools Ruler
While the ruler in Chrome DevTools is highly effective, alternative tools and browser extensions can provide similar functionality. Some popular options include:
- Page Ruler (Chrome Extension): A Chrome extension that allows you to draw a ruler on any webpage to measure distances and dimensions.
- Measure-it! (Firefox Add-on): A Firefox add-on that provides similar functionality to Page Ruler.
- Built-in Browser Zoom: While not a direct replacement for a ruler, adjusting the browser’s zoom level can sometimes help in visually assessing alignment and spacing.
Conclusion
The ruler in Chrome DevTools is an essential tool for web developers who want to ensure precise measurement and alignment of elements on a webpage. By understanding how to use the ruler effectively, you can create pixel-perfect designs, debug layout issues, optimize responsive design, and validate accessibility. Whether you’re a seasoned web developer or just starting out, mastering the ruler in Chrome DevTools will significantly enhance your web development workflow.
By following the tips and techniques outlined in this guide, you can leverage the power of the ruler in Chrome DevTools to create high-quality, visually appealing, and accessible websites.
