The Ultimate Potion Brewing Guide in Minecraft: Become a Master Alchemist
Welcome, aspiring alchemists! In the vast and blocky world of Minecraft, the art of potion brewing is a powerful skill that can grant you incredible abilities, from increased strength and speed to invisibility and healing. This comprehensive potion brewing guide will walk you through every step of the process, ensuring you become a master potion brewing in no time. Whether you’re a seasoned adventurer looking to enhance your combat prowess or a curious newcomer eager to explore the magical side of Minecraft, this guide has everything you need to know about potion brewing.
What is Potion Brewing in Minecraft?
Potion brewing in Minecraft is the process of combining various ingredients in a brewing stand to create potions with beneficial or detrimental effects. These potions can then be consumed or thrown to affect yourself, other players, or mobs. Mastering potion brewing opens up a whole new dimension of gameplay, allowing you to tackle challenges with strategic advantages.
Essential Equipment for Potion Brewing
Before you can start potion brewing, you’ll need to gather some essential equipment. Here’s a list of what you’ll need:
- Brewing Stand: This is the central workstation for brewing potions. It’s crafted using 3 cobblestone and 1 blaze rod. Blaze rods are obtained by defeating Blazes in the Nether.
- Water Bottles: These are used as the base for most potions. You can fill glass bottles with water by right-clicking on a water source.
- Blaze Powder: This is used to fuel the brewing stand. One blaze rod can be crafted into two blaze powder.
Gathering Ingredients for Potion Brewing
The key to successful potion brewing lies in the ingredients you use. Minecraft offers a wide variety of ingredients, each with unique properties that contribute to different potion effects. Here’s a breakdown of some essential ingredients:
Base Ingredients
These ingredients are added to water bottles to create an awkward potion, which serves as the foundation for many other potions:
- Nether Wart: Found in Nether fortresses, this is essential for creating an awkward potion.
Primary Ingredients
These ingredients are added to awkward potions to create the primary potion effects:
- Glistening Melon: Creates a Potion of Healing.
- Spider Eye: Creates a Potion of Poison.
- Fermented Spider Eye: Used for creating potions with negative effects like Weakness and Harming.
- Sugar: Creates a Potion of Swiftness (speed).
- Rabbit’s Foot: Creates a Potion of Leaping (jump boost).
- Ghast Tear: Creates a Potion of Regeneration.
- Magma Cream: Creates a Potion of Fire Resistance.
- Turtle Shell: Creates a Potion of Slow Falling.
- Phantom Membrane: Creates a Potion of Slow Falling.
- Pufferfish: Creates a Potion of Water Breathing.
- Golden Carrot: Creates a Potion of Night Vision.
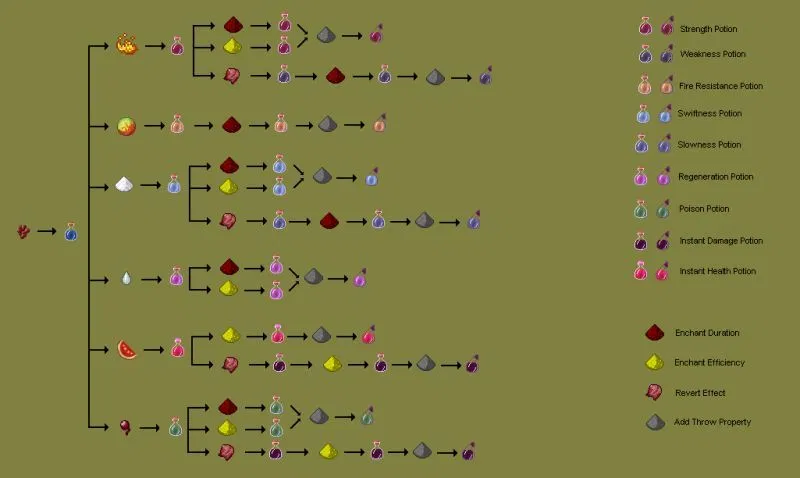
Modifiers
These ingredients modify the duration or potency of existing potions:
- Redstone Dust: Increases the duration of the potion.
- Glowstone Dust: Increases the potency of the potion, but may reduce its duration.
- Gunpowder: Turns the potion into a splash potion, which can be thrown.
- Dragon’s Breath: Turns the potion into a lingering potion, which leaves a cloud of effect.
Potion Brewing Process: Step-by-Step
Now that you have your equipment and ingredients, let’s dive into the potion brewing process:
- Place the Brewing Stand: Find a safe and convenient location to set up your brewing stand.
- Add Blaze Powder: Fuel the brewing stand by placing blaze powder in the bottom left slot.
- Insert Water Bottles: Place up to three water bottles in the bottom slots of the brewing stand.
- Add Base Ingredient: Add the base ingredient (usually Nether Wart) to the top slot. This will create an awkward potion.
- Add Primary Ingredient: Once the awkward potion is complete, add the primary ingredient to the top slot to create the desired potion effect.
- Add Modifier (Optional): If you want to modify the potion, add a modifier like redstone dust, glowstone dust, gunpowder, or dragon’s breath to the top slot.
- Collect Your Potion: Once the brewing process is complete, collect your potion from the bottom slots.
Advanced Potion Brewing Techniques
As you become more experienced with potion brewing, you can explore advanced techniques to create even more powerful and versatile potions.
Combining Potions
Some potions can be combined to create new effects. For example, adding a fermented spider eye to a potion of swiftness creates a potion of slowness.
Splash Potions and Lingering Potions
Adding gunpowder to a potion turns it into a splash potion, which can be thrown to affect a wider area. Adding dragon’s breath to a splash potion turns it into a lingering potion, which leaves a cloud of effect that lasts for a period of time. These are great for crowd control or applying effects to multiple targets. Splash potions are also useful for healing allies from a distance.
Negative Effect Potions
While most potions provide beneficial effects, some potions can inflict negative effects on enemies. These can be useful for weakening opponents or hindering their movement. Examples include Potions of Poison, Weakness, and Slowness. A potion brewing guide wouldn’t be complete without mentioning these. Knowing how to counteract these negative effects is also crucial for survival.
Specific Potion Recipes and Uses
Let’s explore some specific potion recipes and their uses:
Potion of Healing
- Ingredients: Awkward Potion + Glistening Melon
- Use: Instantly restores health.
Potion of Swiftness
- Ingredients: Awkward Potion + Sugar
- Use: Increases movement speed.
Potion of Fire Resistance
- Ingredients: Awkward Potion + Magma Cream
- Use: Grants immunity to fire damage.
Potion of Night Vision
- Ingredients: Awkward Potion + Golden Carrot
- Use: Allows you to see clearly in the dark.
Potion of Water Breathing
- Ingredients: Awkward Potion + Pufferfish
- Use: Allows you to breathe underwater.
Tips and Tricks for Efficient Potion Brewing
Here are some tips and tricks to make your potion brewing process more efficient:
- Organize Your Ingredients: Keep your ingredients organized in chests for easy access.
- Automate Ingredient Collection: Use farms to automate the collection of common ingredients like sugar cane and nether wart.
- Use a Brewing Room: Create a dedicated brewing room with all your equipment and ingredients readily available.
- Experiment with Different Combinations: Don’t be afraid to experiment with different ingredients to discover new potion effects.
Troubleshooting Common Potion Brewing Problems
Sometimes, things don’t go as planned. Here are some common problems and their solutions:
- Potion Not Brewing: Make sure you have blaze powder in the brewing stand and that the ingredients are placed in the correct slots.
- Potion Has No Effect: Double-check the ingredients to ensure you’re using the correct ones for the desired effect.
- Potion Has Unwanted Effect: You may have accidentally added the wrong ingredient or combined potions incorrectly.
The Role of Potions in Minecraft Gameplay
Potions play a crucial role in various aspects of Minecraft gameplay:
- Combat: Potions can enhance your combat abilities, allowing you to deal more damage, resist damage, and move faster.
- Exploration: Potions can help you explore dangerous areas, such as underwater caves or lava-filled environments.
- Survival: Potions can provide essential buffs, such as healing, regeneration, and fire resistance, increasing your chances of survival.
- Farming: Potions of swiftness can speed up crop growth when used on the player tending the farm.
Conclusion: Mastering the Art of Potion Brewing
Congratulations! You’ve now completed this comprehensive potion brewing guide and are well on your way to becoming a master alchemist in Minecraft. By understanding the principles of potion brewing, gathering the right ingredients, and following the steps outlined in this guide, you can create powerful potions that will enhance your gameplay and help you conquer any challenge. Remember to experiment, explore, and have fun with the art of potion brewing!
Happy brewing, and may your potions always be potent! Don’t forget to consult this potion brewing guide whenever you need a refresher.
[See also: Minecraft Enchanting Guide]
[See also: Minecraft Redstone Basics]
[See also: Minecraft Biome Exploration]
